
Hello fellas, we are back with our new creative and interesting blog. We are pretty sure you are going to find it helpful. Did you ever feel drawing a portrait is not your cup of tea? If yes, then you don’t have to worry at all. We are here with an effortless way to draw a portrait. Interesting, Isn’t it? Are you excited to try out your hands-on portraits? I know you are ready. So, please follow the simple steps and you are all set to call yourself an artist.
Materials used:
Pencils: 2H, HB, 2B, 4B, 6B, 7B, 8B, 10B (Staedtler – Mars Lumograph) – 710rs
Eraser: Apsara Nondust and Tombow MONO Zero Eraser – 280rs
Blending: Blending paper stumps (120rs), cotton cloth, Watercolor brush, Q-tips (earbuds – 10 or 15rs)
Scale: Ruler (any brand – 10rs)
Drawing sheet or Century paper (5 or 10rs )

If you are a beginner then I would recommend not to go for such costly materials. The following materials will also work great for you.
Beginner Materials:
Pencils: HB, 2B, 4B, 6B, 8B (Apsara – 1 pencil 10rs)
Eraser: Apsara Nondust and cut portion of eraser (to highlight details of the sketch) – 5rs
Blending: cotton cloth (freely available at home) and Q-tips (earbuds – 10 or 15rs)
Scale: Ruler (any brand – 10rs)
Drawing sheet or Century paper (5 or 10rs – Check the quality of paper)
Total cost – 90rs or around 1.2$ (one-time investment only)

Before moving towards the sketch tutorial, you must know the difference between different kinds of pencils i.e. 2H, HB, 2B, etc. Here, H stands for hard and they leave less graphite on the paper, which means they are lighter. In contrast, B stands for Black and these are softer and leave more graphite on the paper, meaning they are darker.
The advantage of Staedtler Mars Lumograph pencils over Apsara is that they are darker, more black, and softer which is considerable for realistic works. So, you don’t have to worry at all, you can work with Apsara pencils itself.

Let’s get started…
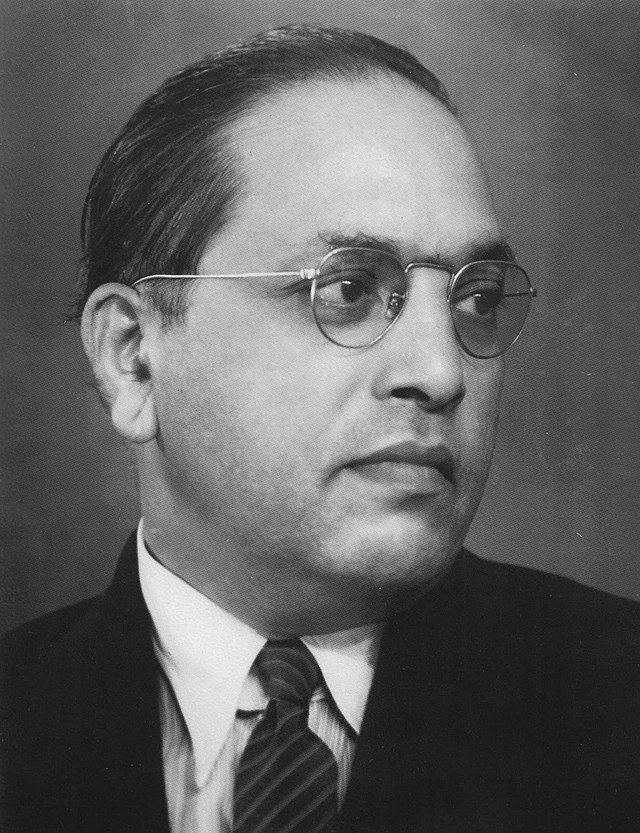
1.Take a black and white portrait picture of your choice for reference.
2. If you are having color picture then you can directly change the image into black and white with the help of available edit feature in your mobile phone or you can even find a bunch of free websites for converting the color image into the black and white format.
3. Please make sure whether the face is clearly visible or not.
4. Now, draw the grid lines using the “Drawing Grid Maker application” (download it from Play Store) or “Drawing Grid For The Artist” (for iPhone users).
5. With the help of a ruler, the grids can also be drawn with your hand only.
6. You can even number the lines for your convenience so you don’t have to count the grids while sketching (it’s up to you whether to mark it or not).
7. Make sure to draw the grids with the 1:1 aspect ratio only. If you are a beginner then I would recommend you to draw a 1inch x 1inch grids (squares).

Oh boy! now the real journey starts.
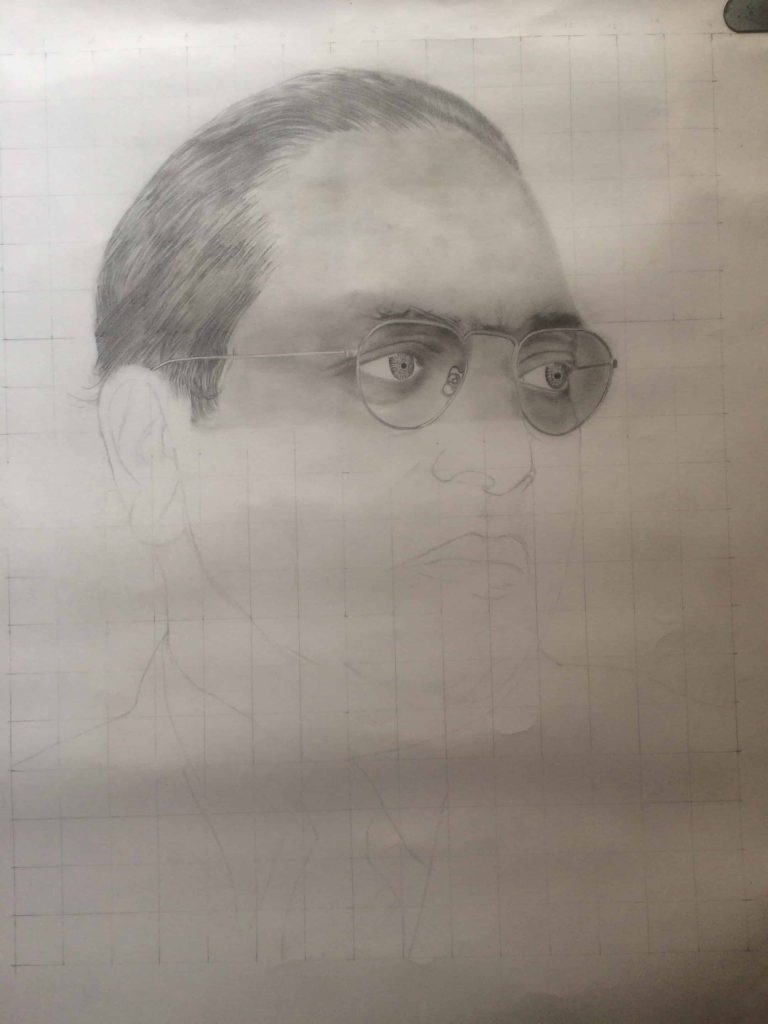
8. Take a Drawing Sheet and depending on your sheet size and requirements, draw the grids on it. I have drawn the 2inch x 2inch grids and made sure that the number of grids also matches with the reference photo.
9. Please don’t put pressure while marking the lines and use light pencils like HB or 2B so it won’t keep its impression when you erase them. You are drawing these lines for reference purposes only which will help to improve the accuracy.

10. It’s time to work on your sketch. To start with it, either count the number of grids or directly refer to the gridline number and draw the outlines.

11. Once you finished the task, have a look at it? Does it look good? Well, even if you are unable to recognize the person then also you won’t have to worry at all. Always remember, it’s just a skeleton and all skeletons look similar.
12. So, our next step is to add shading. Shading plays a similar role as skin layers on the skeleton, which helps us to identify the person uniquely.
13. To draw a portrait, I started from the topmost position. You can begin from any extreme end but I would recommend you to start from the top so that the shading would not get spread.
14. Also, keep tissue paper or white paper beneath your wrist to avoid spreading pencil shade on the sheet which comes into direct contact with your wrist.
Two ways to shade:
1. Single stroke – Choose the pencil (Darkest i.e. 8B for hairs) and shade the portion wherever required and blend it with cloth or Q-tip.
2. Apply layers – Follow the shading pattern and apply layers according to requirements.
If you have never drawn a portrait before or if you are amongst the beginner then I would suggest you to go with 1st way. You just need to have patience because it gets better with time.
If you think you are good at shading then you are free to go with 2nd option. While working on the layering technique you will have to work with the square by square.
Choose one square at a time and follow the reference image for the same square. If you are working on hairs then follow the hair strands. You need to apply the layers from lighter to darker. Initially, I used the HB pencil to draw the flow of hairs. Keep in mind to draw strokes lightly and smoothly. Then with the help of 2B pencil highlight the hair strands. Lastly, you can use the 6B or 8B for highlighting the more darker portion and for blending purpose you can use the brush, q-tip, or paper stump. To highlight the lighter portion of hairs, you can use the cut portion of an eraser.

15. The same goes for the skin portion. I have followed the reference image and mostly used HB pencil for the bottom layer and 2B for highlighting the skin portion. The 4B pencil should be used if required (for a darker part). You can use cloth for blending. If you are a beginner or trying to draw a portrait for the first time, then I will not suggest trying your hands on realistic eyes. Once you get good at it then you can work on details of portraits.
16. While shading, I preferably bend the pencil to avoid the deep strokes. With smooth and light strokes, it is quite efficient to blend the shades.

16. Follow the skin tone of the reference image and shade accordingly.

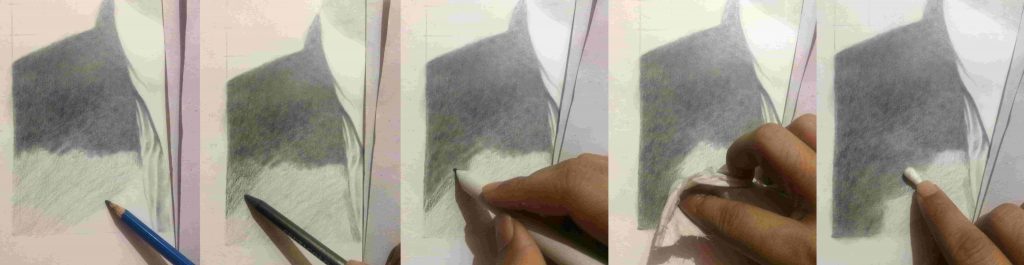
17. You can use various tools for blending. Any blending materials can be used as all will do the same for you. But I would recommend you to use the cloth if you are a naïve user. You will know the difference between them once you will be good at it.

18. In the below image you can see the result of blending using different things.
Wow! I guess we are done with the portrait.

No, wait! Something is missing.
Just erase the surrounded grids and add the background shade. You can add lighter or darker shade depending on the portrait. I have used the 2B pencil for the background. Now, our wait is over. Isn’t it easy to draw a portrait?

I have not gone much into detail because this blog was actually intended for beginners. You can explore new ways and there will be no need to draw grids once you get used to it.
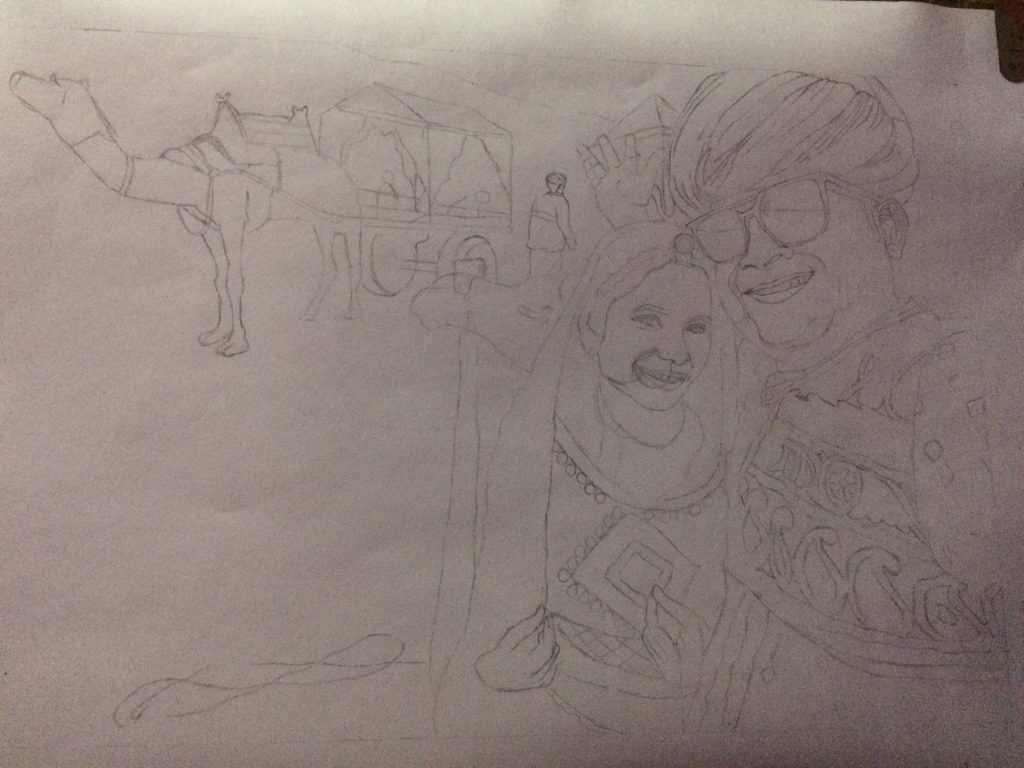
Even the Apsara pencil works great. Don’t you believe me? well, please have a look at my another sketch which I have drawn using Apsara pencils along with it, I just used charcoal pencil for darker portion.


If you have any queries then feel free to drop your message in the comment section or you can also mail us – contactus@askingminds.com
Enjoy the quarantine. Be safe, stay at home, and stay healthy.
“In drawing, nothing is better than the first attempt.” – Pablo Picasso
You may also like: Follow these Study Hacks and Tips to Ease Your Learning


8 Comments
vipul chandak
(April 23, 2020 - 12:45 PM)remember me ?
Asking Minds
(May 8, 2020 - 11:51 PM)Maybe, I think we’ve talked some time. But I don’t remember when we spoke.
Vipul Chandak
(August 14, 2020 - 2:59 PM)i think, last year,,
but that mobile was damaged and i had lost all telegram chats of that time
Asking Minds
(June 20, 2024 - 2:30 AM)Sorry to hear about your experience with the lost Telegram chats due to the damaged phone last year. If you’d like, please share your email or Telegram ID with us. We’ll reach out whenever possible. Apologies for the delayed response.
Jai
(September 6, 2021 - 2:49 AM)Nice post
Asking Minds
(June 20, 2024 - 2:26 AM)Thank you for your feedback on the post! I’m glad you liked it. If you have any questions or need further information, feel free to ask. Happy drawing!
yasadisi bahis oyna
(June 12, 2024 - 9:52 AM)Thank you for sharing superb informations. Your web site is so cool. I am impressed by the details that you have on this blog. It reveals how nicely you understand this subject. Bookmarked this website page, will come back for more articles. You, my friend, ROCK! I found just the info I already searched everywhere and simply could not come across. What a great web-site. Buck Suhr
Asking Minds
(June 20, 2024 - 2:26 AM)Thank you, Buck Suhr, for your kind words and enthusiasm! I’m thrilled that you find the blog helpful and informative. I appreciate your bookmark and look forward to sharing more articles with you. Happy reading!